
Accepting PayPal
PayPal
PayPal adds flexibility to your payment method offerings.
At a high level, there are three key steps to integrating Stax.js with PayPal.
- Initializing Stax.js.
- Optional: Manually setting the price on a Transaction with Stax.js
- Setting up your HTML form.
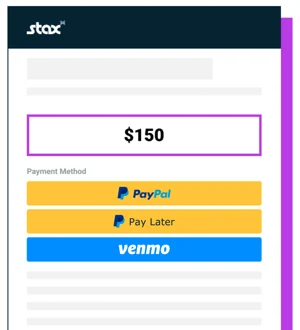
- Displaying the payment buttons.
A Note about TokenizationIf you are tokenizing payment methods, PayPal tokenization is currently not supported. If you are storing payment methods, the PayPal payment option will not appear on customer payment page as an option.
1. Initialize Stax.js to use PayPal:
To integrate PayPal with Stax.js, Stax.js needs to be initialized first. To initialize Stax.js, you’ll need a WebPayments token and an optional configuration. All of the staxJsConfig fields are optional. However, if the price is unset, you must call the setTotal function described below.
const webpaymentsToken = "<STAX_WEBPAYMENTS_TOKEN>";
const staxJsConfig = {
  price: "1.00"
  number: { /* optional */
    id: "#card-number",      /* The HTML DOM ID of the number field */
    type: "prettyFormat",    /* The formatting type */
    label: "Card Number",    /* The <label> text in the <form> */
    placeholder: "card",     /* The <input> placeholder text */
    focus: false,            /* If true, autofocus this input */
  },
  cvv: { /* optional */
    id: "#card-cvv",         /* The HTML DOM ID of the number field */
    type: "maskedFormat",    /* The formatting type */
    label: "Security Code",  /* The <label> text in the <form> */
    placeholder: "code",     /* The <input> placeholder text */
    focus: false,            /* If true, autofocus this input */
  },
  ocr: { /* optional */
    key: "",    /* The OCR key */
    timeout: 5, /* Timeout in seconds to wait for OCR completion */
    /* optional CSS styling */
  },
};

const staxjs = new StaxJs(webpaymentsToken, staxJsConfig);
i. Optional: Manually setting the price on a Transaction with Stax.js
After Stax.js has been initialized, you can set the transaction amount. If you passed in a value for price in the initial Stax.js config, it will be overwritten by this call. This can be useful for dynamically updating the price as customers add or remove items on a checkout page. The total is represented in dollars, which can be a string or number type. “1.00”, “1” or 1 will charge the customer $1.00.
/* Set the total to $1.00 */
staxjs.setTotal(1.00);
2. Create the HTML Container
In your HTML, create the container where the PayPal buttons will be rendered. Ensure that the main div has an ID so that the showPayPalButtons() can render the buttons appropriately.
<div class="group">
    <div id="pay-with-paypal"></div>
 </div>
3. Display PayPal Options
Once the user is ready to pay, call the function to show the buttons to the user. This function takes the user's PayPal configuration and displays the appropriate PayPal buttons. The selector should match the ID in the HTML.
const paypalConfig = {
  selector: "#paypal-button-container",
  enableFunding: ["venmo", "paylater"], /* optional */
  invoiceId: "<STAX_INVOICE_ID>", /* optional */
}
staxjs.showPayPalButtons(paypalConfig);
i. Optional: Pass additional Payload data
Before the user clicks a button, you can optionally pass a transaction payload to Stax.js using the setPayPalTransactionPayload method. The following optional parameters can be included:
- meta: A metadata object for the transaction (e.g. memo or custom notes).
- customerId: The internal Stax customer ID to associate with this payment.
- email_receipt: A boolean (true or false) indicating whether to send an email receipt to the customer.
const memo = "Note about the transaction";
const additionalTransactionData = {
  meta: { memo: "Note about the transaction" },
  customer_id: "<STAX_CUSTOMER_ID>",
  email_receipt: true,
};
staxJs.setPayPalTransactionPayload(additionalTransactionData);
ii. Enabling Venmo and Buy Now, Pay Later
In the above example, the optional enableFunding flag takes an array of strings to enable funding via Venmo and Buy Now, Pay Later channels. To enable Venmo payments, include Venmo in the array. To enable Buy Now, Pay Later, include paylater in the array. If the array is empty, neither option will appear. Conversely, if the enableFunding field is omitted from the config, all three options will appear.
| enableFunding Value | Buttons Shown |
|---|---|
| null or undefined | PayPal, Venmo, and Buy Now, Pay Later |
| [“venmo”, “paylater”] | PayPal, Venmo, and Buy Now, Pay Later |
| [“venmo”] | PayPal and Venmo |
| [“paylater”] | PayPal and Buy Now, Pay Later |
| [] | PayPal |
Notes on Customer Matching on the Hosted Payments Page
When a merchant uses the Hosted Payments page in Stax Pay, a customer_id cannot be passed in. A new customer will be created or matched. The customer’s details are gathered from the PayPal account. The customer is matched based on the Core API’s matching in this order:
- company, address_1, and address_city
- firstname and phone
- firstname, lastname, address_1, and address_zip
- lastname and phone
Customer Matching on ISV/Integration
When a merchant/partner is not using the Hosted Payments page but using StaxJS manually, customers are only matched on the Invoice’s Customer ID. If the payment does not have an associated invoice, a new customer (and invoice) will be created. To avoid this, take the following steps:
- Create a customer using the
POST /customerAPI. - Create an invoice using the
POST /invoiceAPI. Be sure to include the above customer.id. - Set the invoice for the transaction using the
StaxJS#setPayPalTransactionInvoiceId().
The final transaction will now be linked to the customer created in the initial request.
PayPal enabled checkYou can use the GET a merchant by ID to validate if PayPal is enabled for them by checking if allow_paypal value is set to true or false.
GET Merchant by ID
Updated 3 months ago