
Adding Custom Input Fields to your Invoices
Custom Input Fields are part of our advanced customization add-on, allowing merchants to add optional or required fields for customers or staff that help to organize payment data better.
Steps to add Custom Input Fields:
- Log in to Stax Payments.
- Select Settings from the bottom of the menu on the left side of the screen.
- Select Invoice Settings from the menu bar at the top of the page.
- Scroll down to the section titled Invoice Custom Fields.
- Fill in these fields with your desired information.
- To add more than one Custom Field, click + Add Custom Field and repeat step 4.
- If you'd like to make a field required, toggle the Required option.
- Once all fields are completed as desired, click Save Custom Fields.
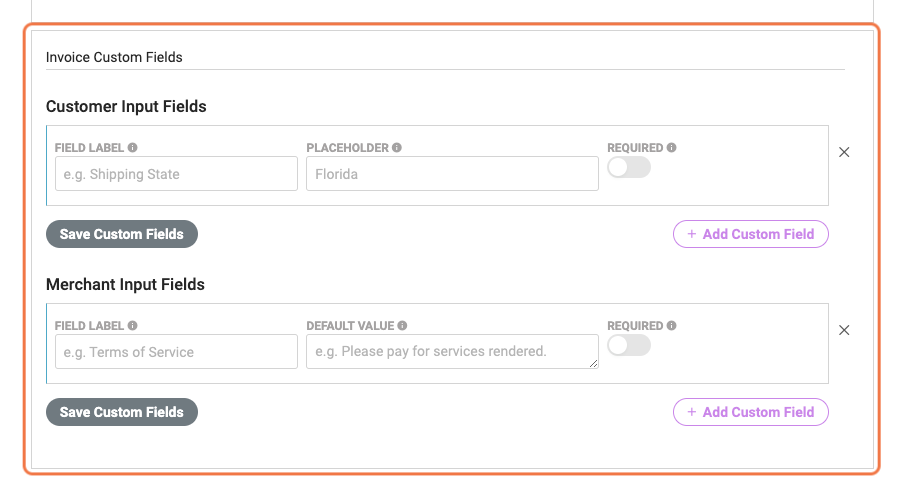
Custom Field Options:
You have four fields to edit for customizing the information you’re requesting or requiring:
- Customer Field Label: The name of the custom field displayed to your customers.
- Customer Placeholder: Faint text in the entry box to guide users before they enter text.
- Merchant Field Label: Displayed on the New Payment or Invoice page and later appears with the message shown to customers.
- Merchant Default Value: The default message will populate on the New Payment or Invoice page. If unchanged, it will appear on the customer's invoice.
Updated 7 months ago