
Using Payment Links
Payment links are a way to easily collect payments from customers online—no coding or development needed! You can receive payments quickly by sending a link in an email, a button on a website, or even a QR code. With Stax, payment links are easy to use, and no coding or development experience is required. You can customize the link or Pay Now button associated with it to make it as simple or complex as you like. In addition, you can manage each payment link you create with the ability to view the number of transactions or change values and deactivate a link you no longer require. Payment links are an easy way to allow customers to pay online without the need for added complexity or a website. Easily copy your payment link and provide it to your customer via SMS text, email, social media, etc.
Creating a Payment Link
- In Stax Pay, click Payment Links in the left menu.
- Click the + Payment Link button on the top right to create a new payment link.
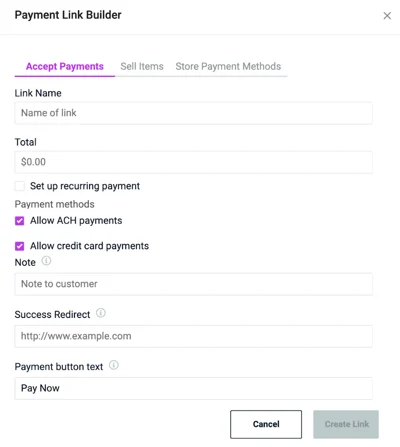
- On the Payment Link Builder window, enter the name, total, and any other information related to the payment link.
Note: If you do not enter a total, the customer will need to manually enter an amount.
-
When complete, click Create Link.
The generated link will appear on the Payment Links Overview page.
Using a Payment Button
Payment buttons visually represent any active payment link and can be used in HTML emails or placed on your website. To use a payment button, complete the following:
-
In Stax Pay, click Payment Links in the left menu.
-
Select the ellipses next to the payment link on the Payment Links Overview page and then click Edit.

-
On the Payment Links Builder page, you can change the button's name and click Copy Button HTML.

-
Paste the HTML button on your website or email.
Managing your Payment Links
You can deactivate, activate, and delete payment links on the Payment Links Overview page.
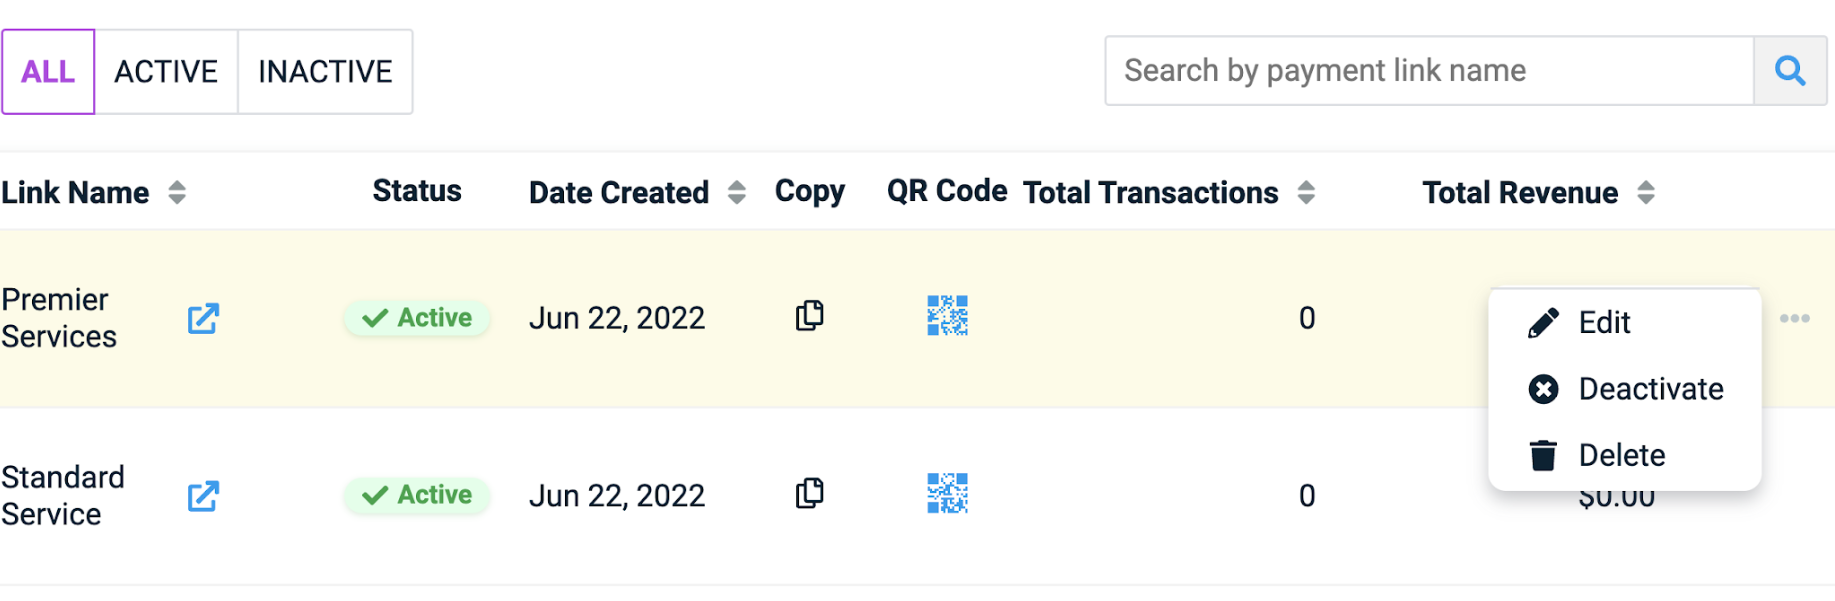
By clicking the ellipses on each payment link row, you can edit, deactivate/ activate, or delete the payment links. On the overview page, you can see which payment links are active, the number of times they have been used, and the revenue they have generated.
NOTE: You can preview a link by clicking the preview button next to the name of the payment link.
Customizing your Payment Links
Add Products or Services
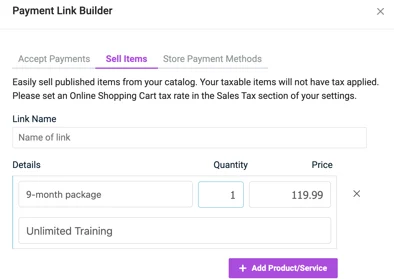
If you have products or services, you can customize the payment link to the product or service. This allows you to link and create invoices for the products or services sold, saving you time.
-
In Stax Pay, click Payment Links in the left menu.
-
Click the Payment Link button on the top right.
-
On the Payment Link Builder window, click the Sell Items tab.
-
Name the link, add any pre-existing products or services, and then click Create Link.
Payment Link General Settings
Payment settings allow you to modify custom fields in the payment section, facilitate matching existing customers, and customize the payment button.
-
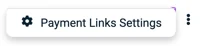
Click the ellipses next to the + Payment Link button to access Settings.
-
In Settings, you can add custom fields to the payment window, change the default customer matching, and adjust the color of the payment link button.
Add Custom Fields
You can create custom fields that your customers can fill out. This can be used to indicate a particular service or preference. Text input fields allow the user to enter any value, while the drop-down menu is prepopulated with a selection set by the merchant.
-
In Stax Pay, click Payment Links in the left menu.
-
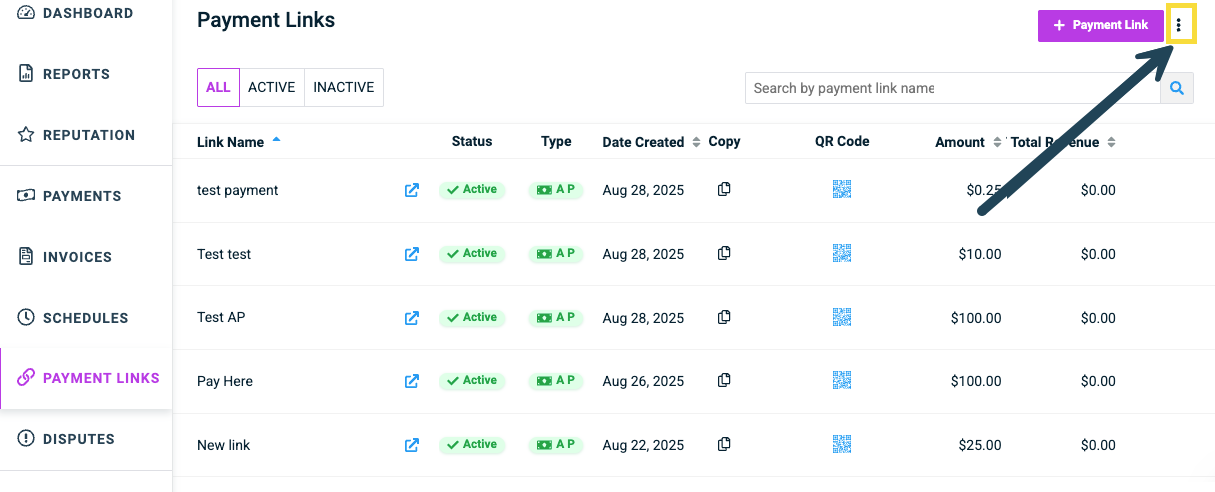
Click the three vertical dots next to the Create Payment button on the top right to view Payment Link Settings.
-
On the Payment Link Settings page, you can edit, delete or create new custom payment link fields.
-
Click the Add New Custom Field button and click either a text field or a dropdown.
- Enter a field name and whether it is required. Depending on the type chosen, you can add options to the dropdown and their corresponding names.
- For a dropdown menu, you must add a Value, which is the internal value sent back to the server. The Option label is what will be displayed on the page. Note that these can be different values.
-
Click Save.
Custom Fields, such as the text input and dropdown menu, will be displayed on all payment link pages.
Dropdown custom fields are available for payment links only.
Updated about 20 hours ago