
White-Glove or Manual Enrollment
This article will walk through the steps to create a merchant using our white-glove enrollment method.
Provide your merchants a white glove experience and fill out the enrollment form using the Stax Connect Command Center.
White-Glove Procedure
Your sales or support personnel with access to Stax Connect can white-glove enroll merchants. Follow the step-by-step instructions below:
- Log in to Stax Connect and select Merchants on the left-hand side of the page.
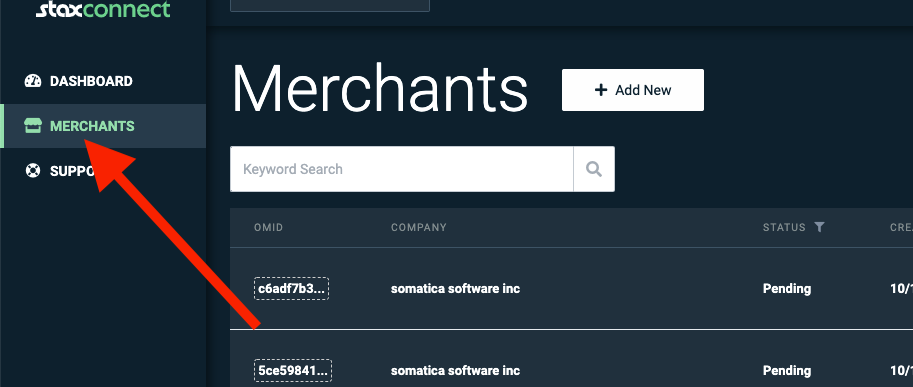
- Click Add New.

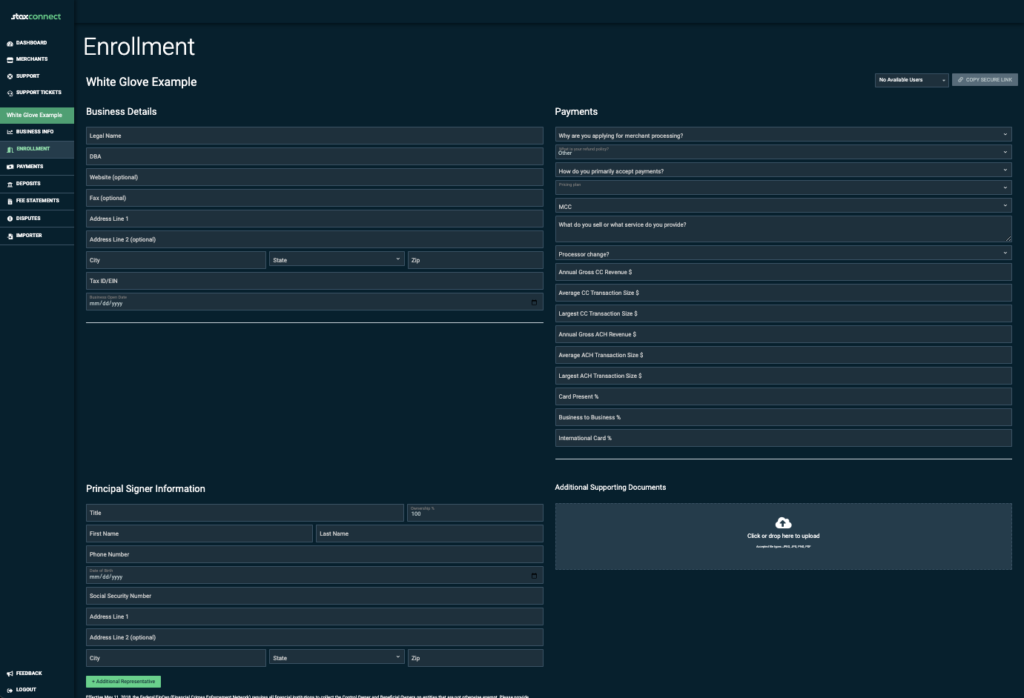
- A New Merchant modal will appear where you can complete the required information.
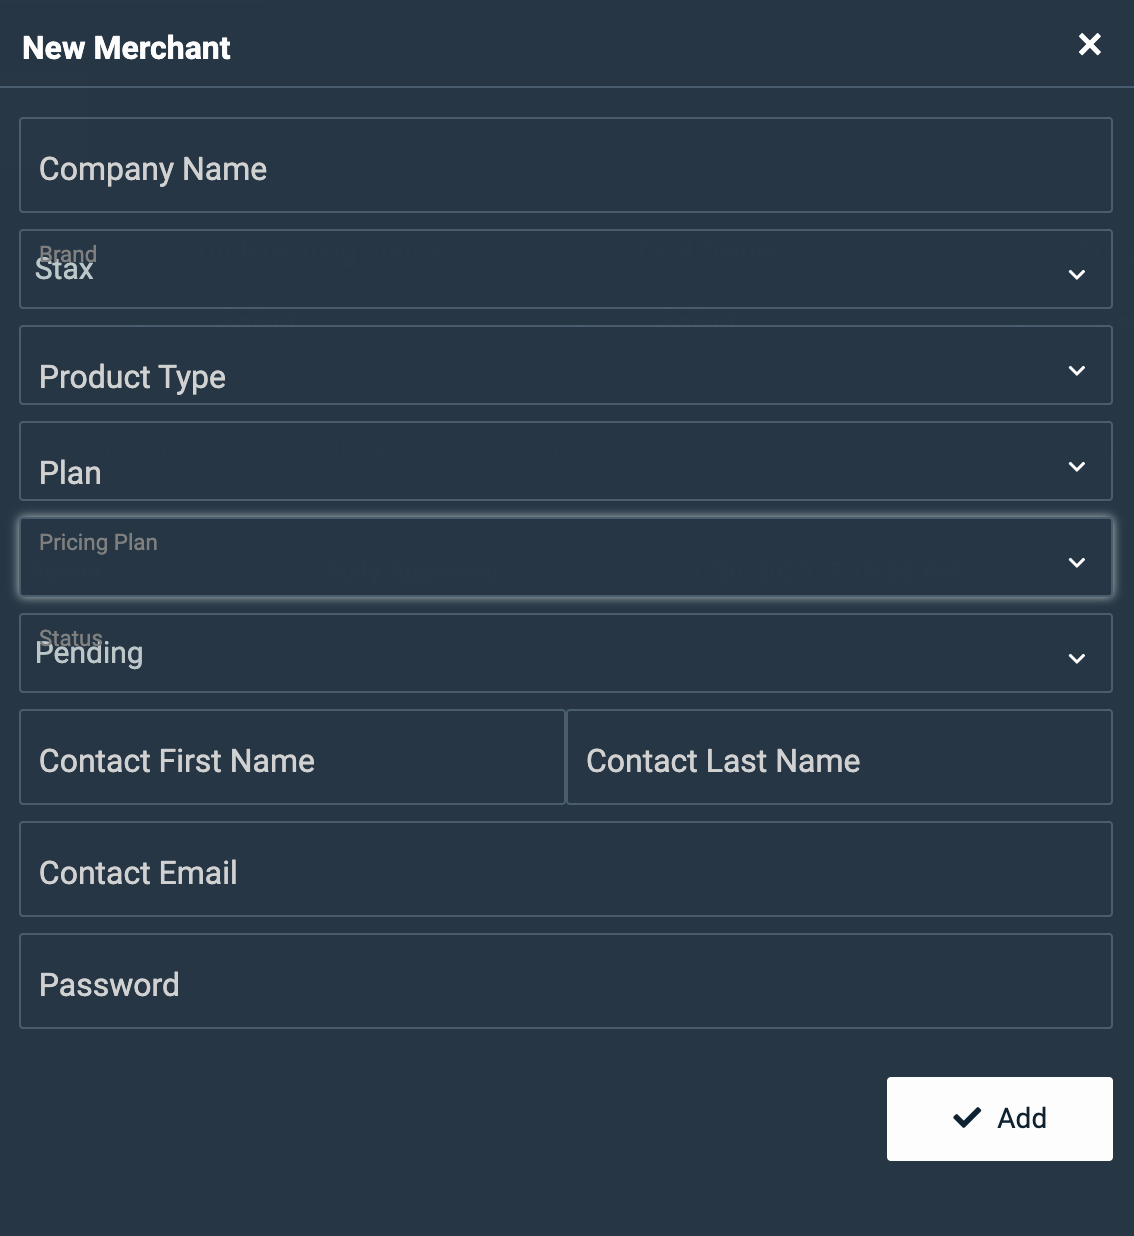
- Fill out the following fields with the following information:
- Company Name: Input the legal name of the company enrolling for payment processing.
- Brand: The brand should be pre-filled with your Partner's name.
- Product Type: Select “Other”.
- Plan: This is usually your company's name or a different plan like "API" or "premium," but this will control what the merchant can see in their white-labelled Stax Pay dashboard. You can usually select your company name if available in the dropdown, or consult with your Implementation Manager if you have any questions.
- Pricing Plan: If you have several pricing options available for your merchants, please select the appropriate one for that merchant. This will be available in the merchant's SMA (sub-merchant agreement) at the end of the application.
- Keep the status as “Pending,” allowing the application to be submitted to the Stax underwriting queue once it has been signed.
- First Name: First name of the contact filling out the application on behalf of the business.
- Last Name: Last name of the contact filling out the application on behalf of the business.
- Contact Email: Email of the person signing up for payment processing.
- Password: Input a password for the merchant. As a best practice, create a random password, but do not share this with the merchant. Allow them to set their password for their application using the “Forgot My Password” when you send them the registration or “magic” link.
- Your password must contain at least eight characters, a mix of letters, numbers, and a special character.
- It must have a capital letter.
- It must have at least one number.
- It must have at least one special character (!, @, #, $, %, &).
- Click Add.
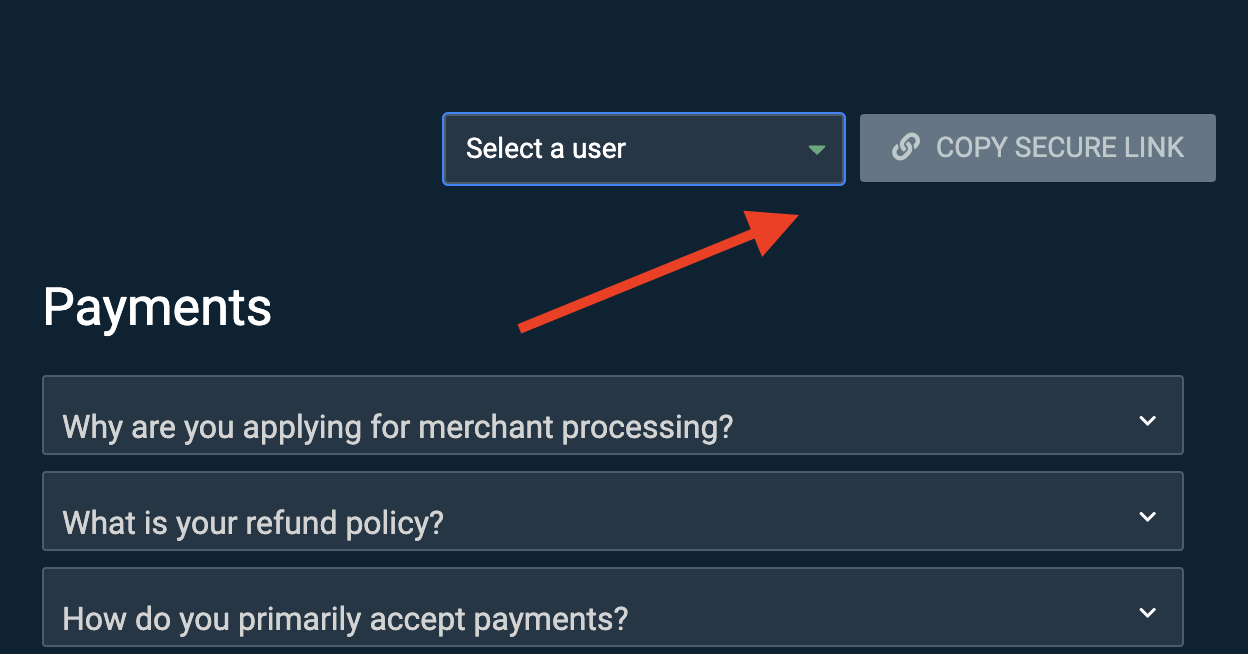
- The Enrollment tab will open. At the top right, select the user you associated the application to and click Copy Secure Link. This will copy the link for the enrollment form you just started.
- Paste this into an email to the sub-merchant so they can open the link and complete their enrollment.
It is also beneficial to send the customer the Enrollment Checklist document to help expedite their enrollment.
We recommend emailing your customer the secure link and a brief explanation of the next steps to walk them through what to expect. Here's a sample email template:
Hello [Insert customer’s name here]:
Congratulations!! You’re one step closer to a better way to process payments! All we need you to do is to complete the enrollment by clicking this link : [insert copied link here] and complete the remainder of your payments application.
You have 24-hours to click into the link. After that, the link will expire and you’ll need to sign in here in order to access your application to make any edits or changes pre-approval.
To help, we have included our enrollment checklist. If you have the items on this checklist available at the time of filling out your application, you can get it finished in under 5 minutes!
If there are any questions or you need some assistance, please let us know.
Thank you,
[Insert name here]
Updated 2 months ago